Mac에서 Docker 설치하기
macOS에서 Docker를 설치하기 위하여 먼저 DockerToolbox를 설치합니다 (요세미티 보다 오래된 버전에만 해당됨). 해당 프로그램은 Docker를 구동 및 관리 하기 위하여 필요한 컴포넌트와 Virtualbox의 설치를 도와줍니다.
https://www.docker.com/products/docker-toolbox
도커는 맥의 Hypervisor framework와 vmnet framework 기반에서 동작합니다.

Docker community edition
맥에서는 두가지 버전의 도커가 있습니다. Community와 Enterprice 입니다. Commnunity 버전은 무료이고 Enterprice 는 유료입니다. 유료버전은 상응하는 향상된 기능과 기술지원이 가능합니다.
Docker community edition을 설치합니다. 아래의 링크에서 설치 파일을 다운 받습니다. Get Docker 를 클릭하여 Docker Coummnity Edition for Mac을 설치합니다.
https://store.docker.com/editions/community/docker-ce-desktop-mac?tab=description
패키지를 설치 완료후 터미널에서 도커의 버전을 확인하고 Hello-World라는 이미지를 다운받고 컨터이너를 실행해보록 하겠습니다.
$ docker version
$ docker run hello-world
Unable to find image 'hello-world:latest' locally
latest: Pulling from library/hello-world
78445dd45222: Pull complete
Digest: sha256:c5515758d4c5e1e838e9cd307f6c6a0d620b5e07e6f927b07d05f6d12a1ac8d7
Status: Downloaded newer image for hello-world:latest

Hello from Docker!
This message shows that your installation appears to be working correctly.

To generate this message, Docker took the following steps:
 1. The Docker client contacted the Docker daemon.
 2. The Docker daemon pulled the "hello-world" image from the Docker Hub.
 3. The Docker daemon created a new container from that image which runs the
    executable that produces the output you are currently reading.
 4. The Docker daemon streamed that output to the Docker client, which sent it
    to your terminal.

To try something more ambitious, you can run an Ubuntu container with:
 $ docker run -it ubuntu bash

Share images, automate workflows, and more with a free Docker ID:
 https://cloud.docker.com/

For more examples and ideas, visit:
 https://docs.docker.com/engine/userguide/
위의 로그중에서 Hello from Docker! 가 보이면 설치가 잘 된것입니다.
kitematic을 사용
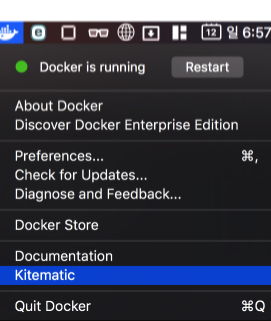
Kitematic은 Docker 관리 운용을 위한 GUI 툴이니다. 맥의 상단 툴바에서 다음과 같은 고래 아이콘을 찾을 수 있습니다. 클릭하면 도커 설정 및 Kitematic 메뉴를 실행할 수 있습니다.
처음 Kitematic을 실행하면 사용자 등록을 요구합니다. 간단히 등록을 마치면 Docker Hub에서 공개한 이미지들을 볼 수 있습니다.
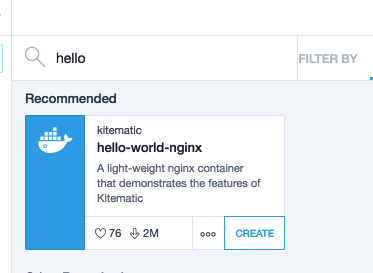
검색창에 hello를 입력합니다 hello-world-nginx가 보입니다. Create 버튼을 눌러서 이미지를 다운받고 컨테이너를 생성해보도록 하겠습니다.
다운이 완료되면 running으로 표시되고 컨솔 로그가 보입니다. 우측에 web preview를 클릭하여 웹페이지가 로딩되는지 확인해봅니다.
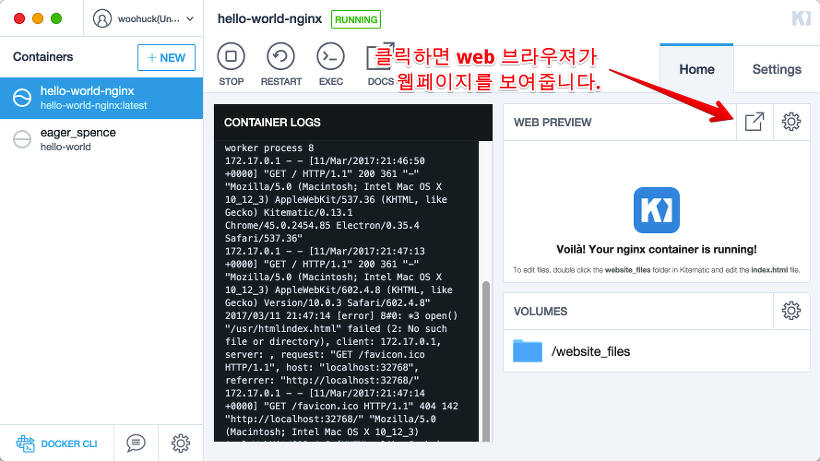
확인후에 Kitematic에서 Stop 버튼을 클릭하여 컨테이너를 정지합니다.
터미널에서 설치된 도커의 이미지들을 확인해봅니다.
$ docker images
REPOSITORY                    TAG                 IMAGE ID            CREATED             SIZE
hello-world                   latest              48b5124b2768        8 weeks ago         1.84 kB
kitematic/hello-world-nginx   latest              03b4557ad7b9        21 months ago       7.91 MB
'Programming > Docker' 카테고리의 다른 글
| 우분투에 도커 설치 및 asp.net core 기본앱 실행 (0) | 2017.01.03 |
|---|
